Overview
To build or submit iOS apps to the iTunes Store/App Store you require an iOS Developer Account. Below are the steps on how to set up your iOS developer account.
According to the Apple’s App Review Guidelines, it is important that the apps are submitted directly by the provider of the app’s content using their own Apple Developer Account. If the app details and the developer account do not match then the submitted iOS app will be rejected by the app review team.
For more information about the iOS Developer Account, check our article here iOS Developer Account Requirements
Creating your first iOS Developer Account
Follow these steps to sign up for an iOS Developer Account with Apple:
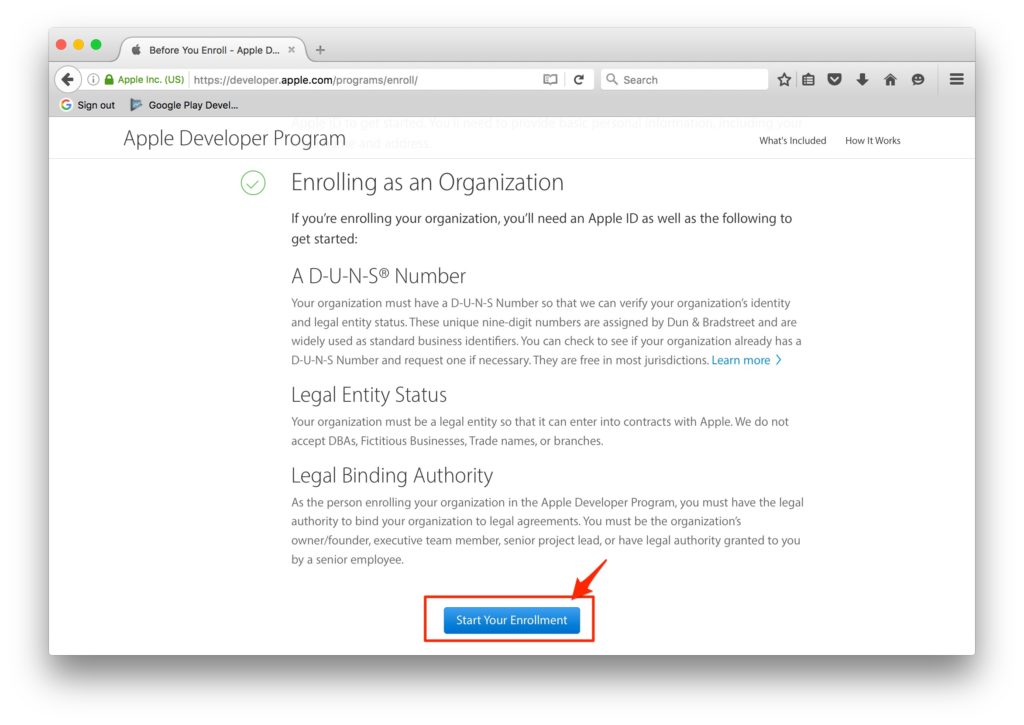
1. Go to: https://developer.apple.com/enroll/
2. Select the option ‘Start Your Enrollment‘
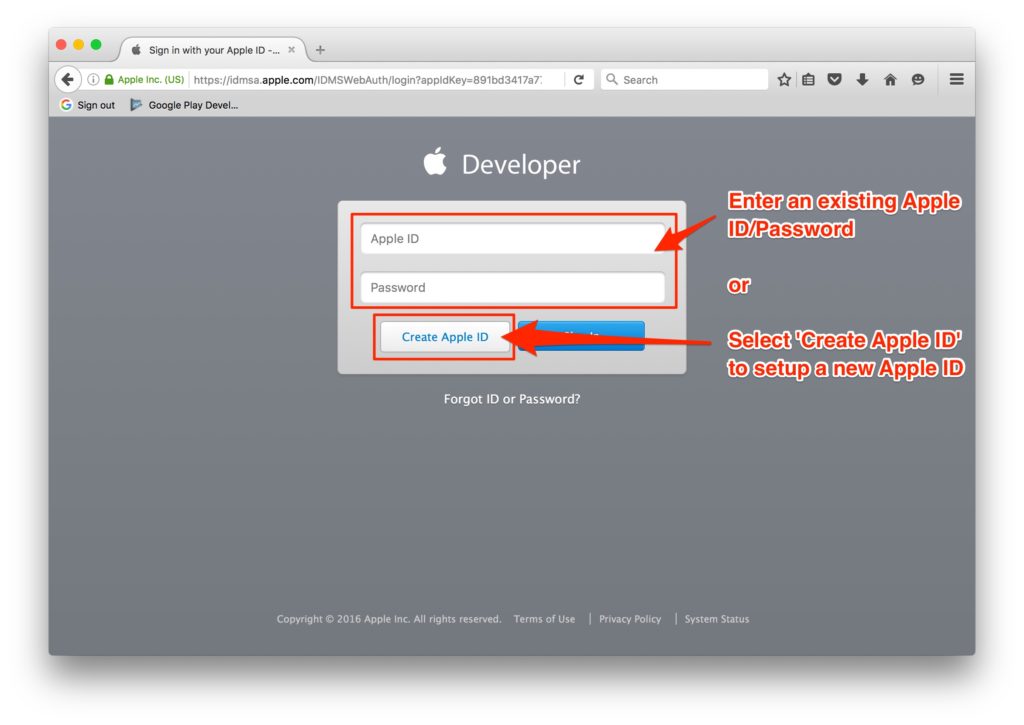
3. Sign in using an existing Apple ID or click ‘Create Apple ID’ to create a new Apple ID
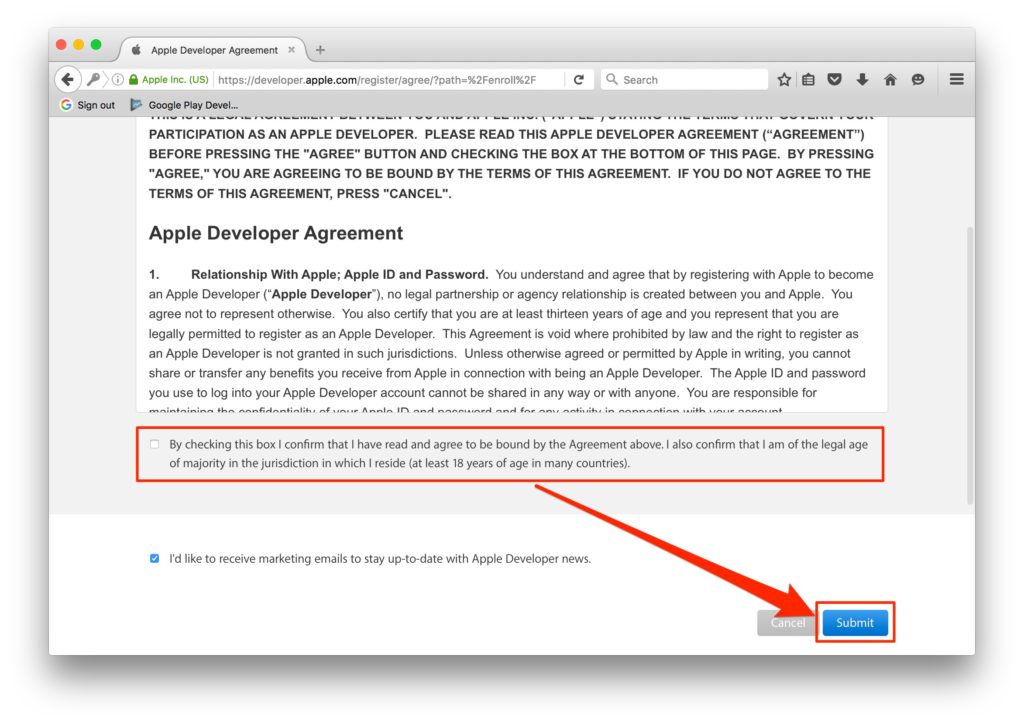
4. Read the Apple Developer Agreement then check the ‘By Checking this box I confirm that I have read and agree…’ box and click the ‘Submit’ button
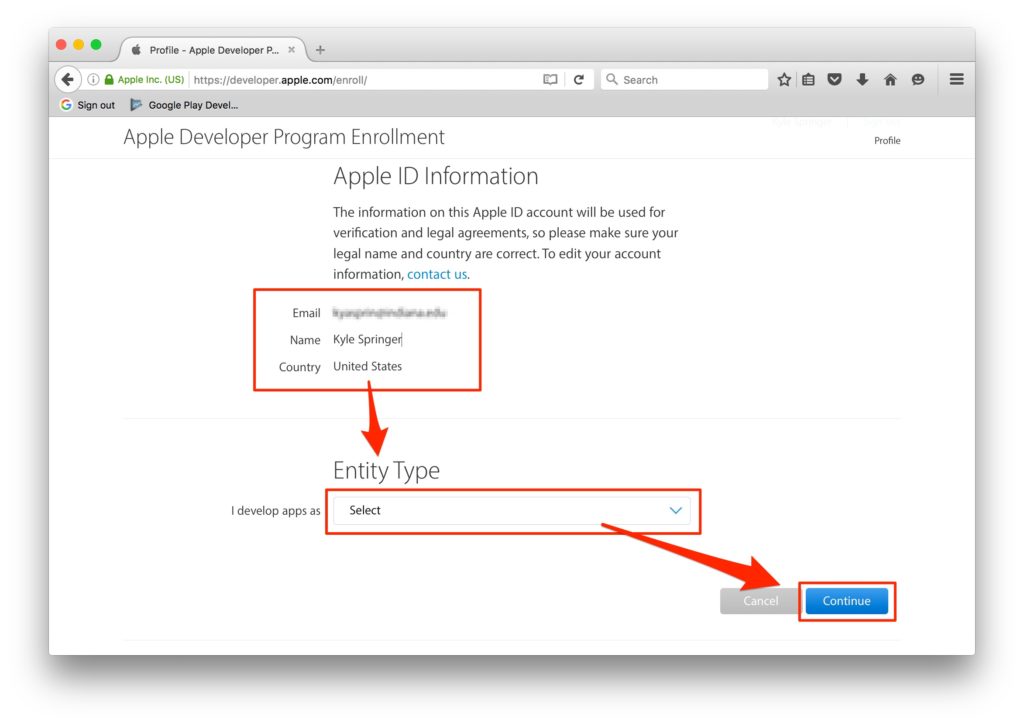
5. Confirm that your email address, name, and Country location is correct, then select one of the options from the Entity Type dropdown. The Developer name listed on the iTunes App Store is based on the type of account selected from the options below. Apps published to Individual Developer Accounts will display the name listed on the iOS Developer Account. Apps published to Company/Organization Developer Accounts will display the Company Name entered within the iOS Developer Account.
- Individual/Sole Proprietor/Single Person Business: Individuals or companies without an officially recognized business (company without a Dun and Bradstreet number). This account only allows for a single primary login to be created to the iOS Developer Account
- Company/Organization: Legally recognized Companies with a Dun and Bradstreet number can select this option. This will allow multiple user logins to be created and managed with varying permissions capabilities for each login. See here to check if your company is a legal recognized company with a Dun and Bradstreet number.
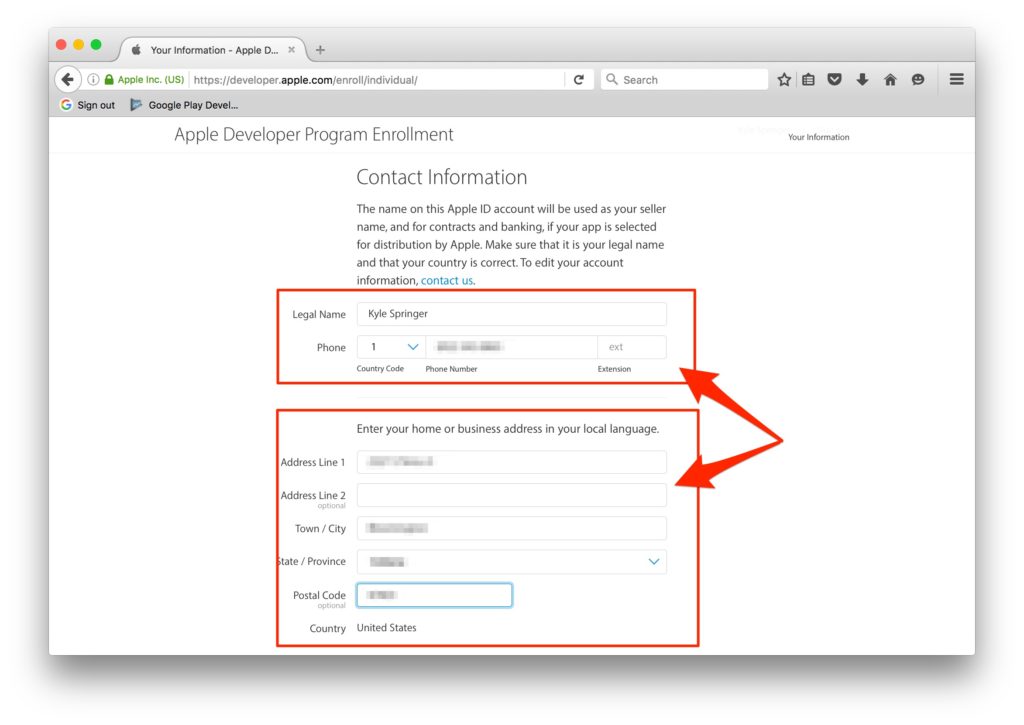
6. Fill in the Contact Information for your iOS Developer Account
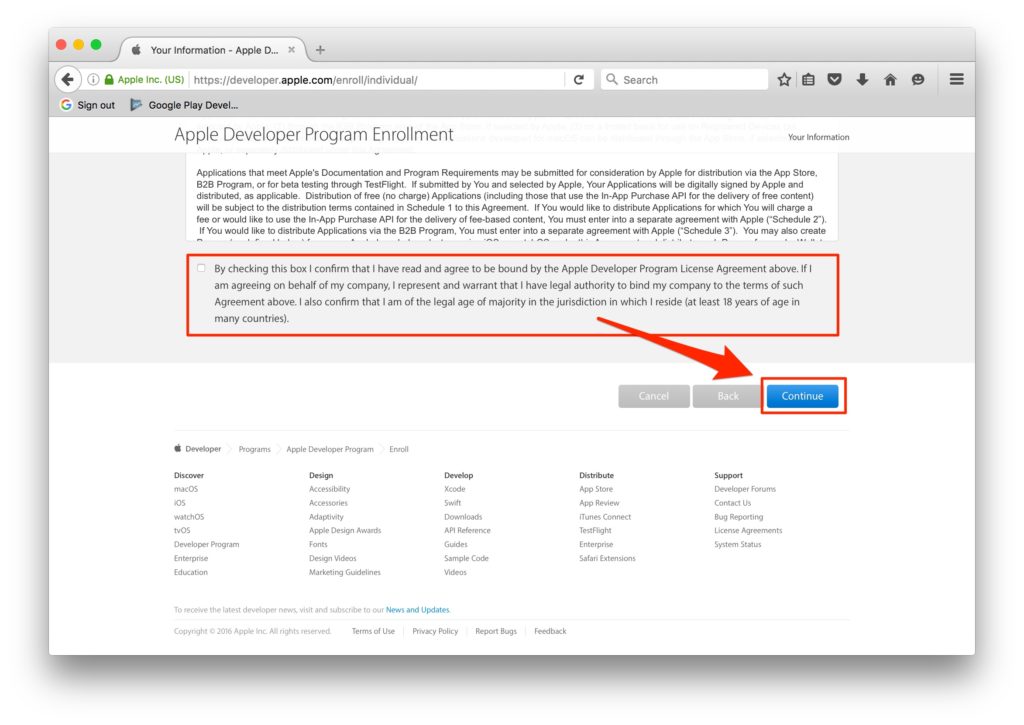
7. At the bottom of the screen, read the Apple Developer Program License Agreement, check the ‘By checking this box I confirm that I have read and agree…’, box, then click ‘Continue’
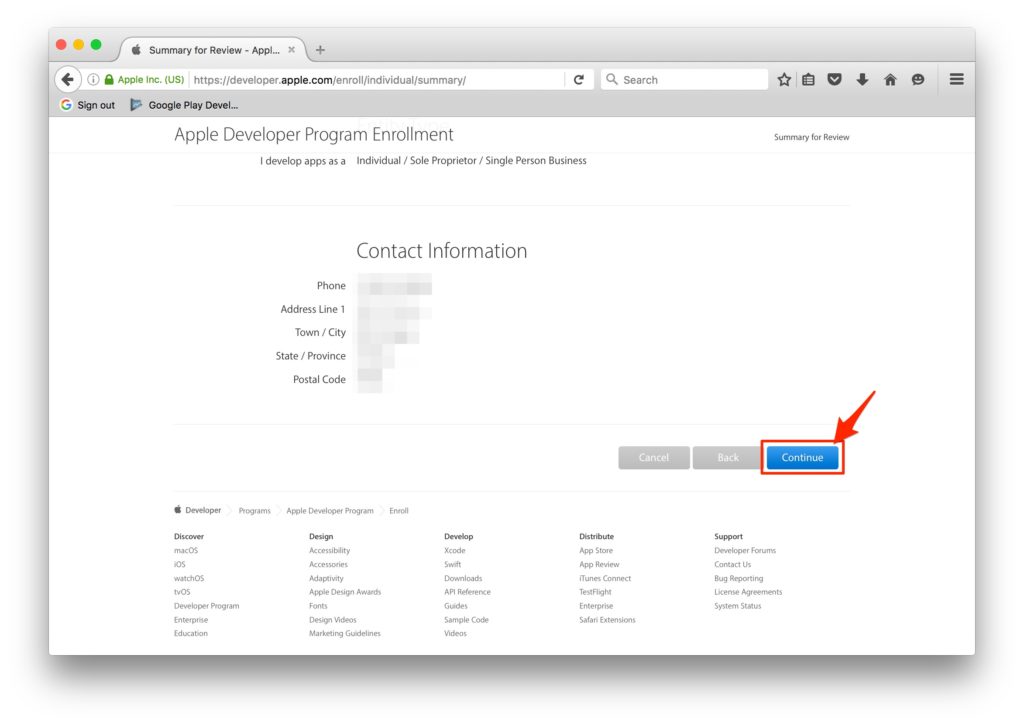
8. Confirm the Apple ID Information, Entity Type, and Contact Information and hit ‘Continue’
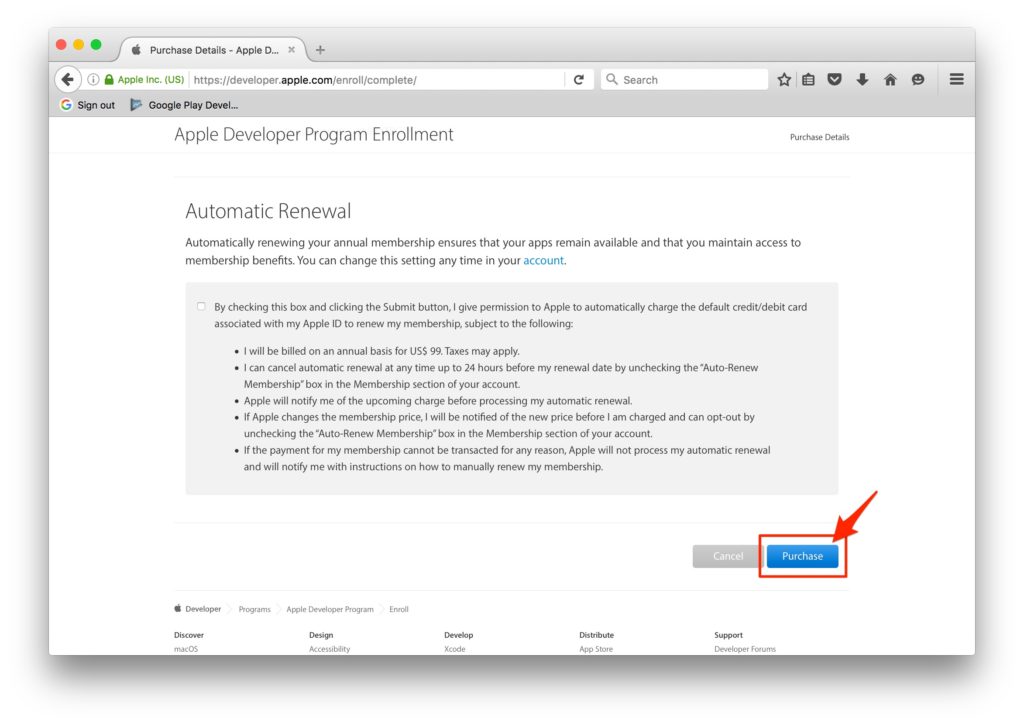
9. If you would like automatic renewals select the auto-renewal box (this is option and not required), then click ‘Purchase’ to enroll and pay for your yearly iOS Developer Account
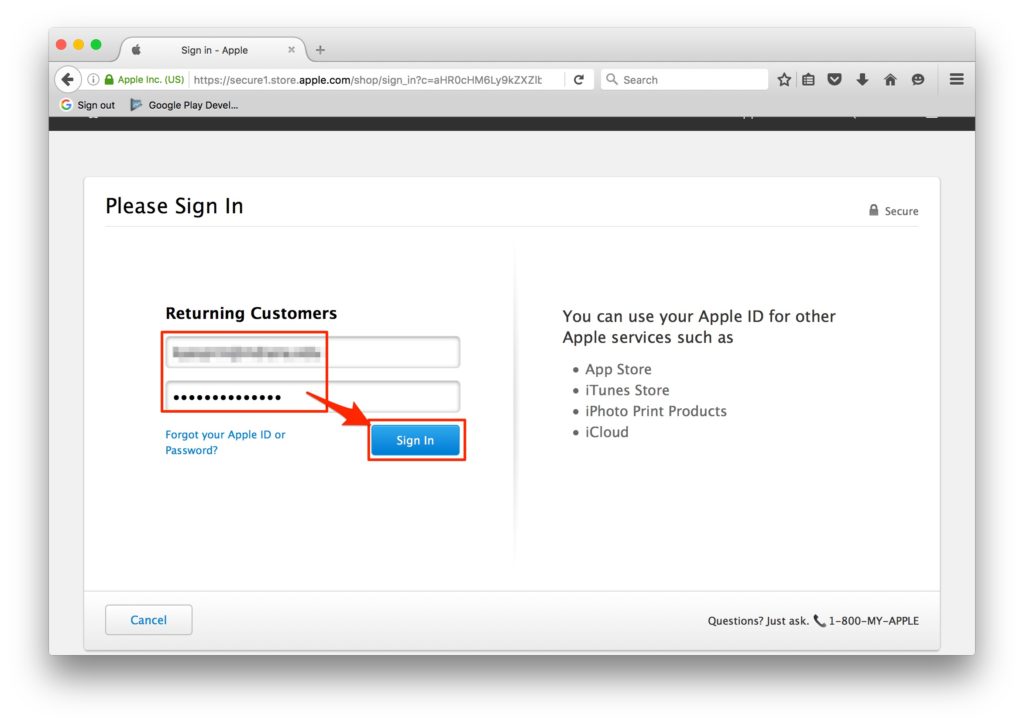
10. Sign in with your Apple ID/password
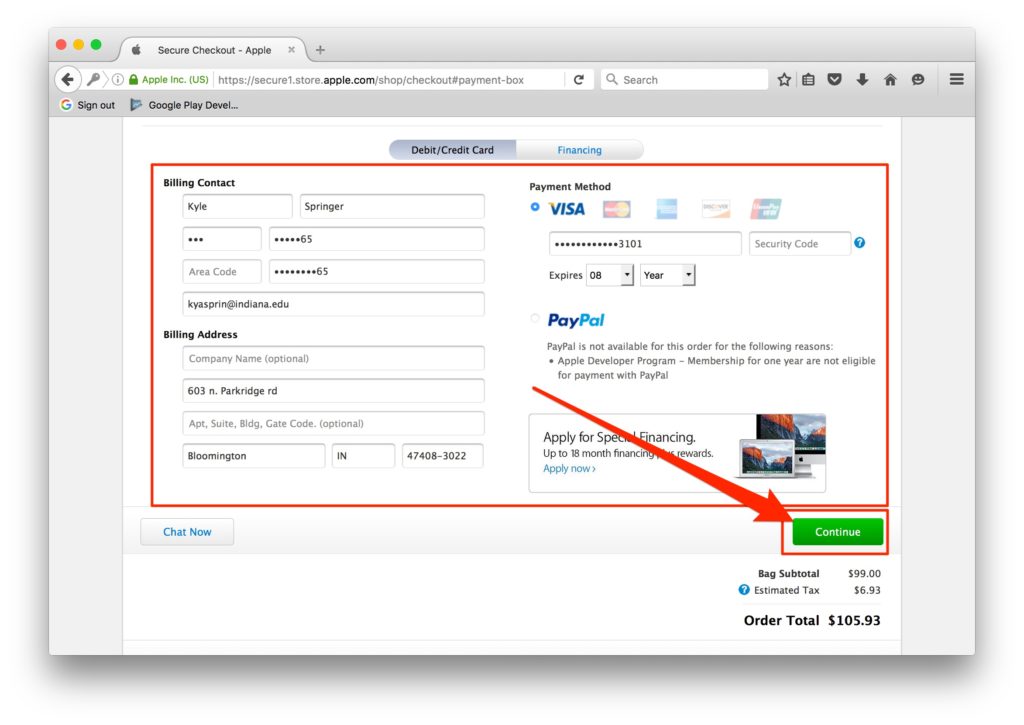
11. Fill in the billing information and press ‘Continue’ to complete the payment and setup of your yearly iOS Developer Account!
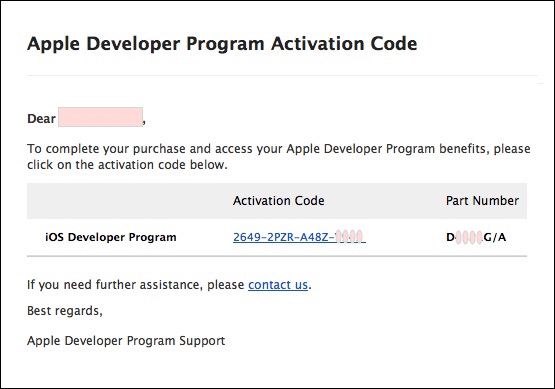
12. Fill in any remaining information on the following screens. Apple will send a confirmation email within 24 hours notifying you that your iOS Developer Account was successfully created!
13. You can contact us for any Additional help!

